We all need a tune-up every once in a while, and this goes for PDP water trap in your 3730 as well. These PDP water traps should be flushed about once a month using distilled or deionized water.
By performing this procedure at least once a month, you’ll clear out any diluted polymer and bubbles. It’s best to leave the trap filled with the water. Doing this as a part of your regular maintenance will greatly decrease the chances of having a problem with your pump.
Step-by-step, here are some details that you might want to keep in mind before this monthly tune-up for your 3730:
Step 1:
Fill the supplied 20 mL, all-plastic Luer lock syringe (PN 4324463) with either distilled or deionized water. Be sure to expel any bubbles from the syringe.
**Note** Do NOT use a syringe smaller than a 20 mL because this may generate an excessive amount of pressure within the trap.
Step 2:
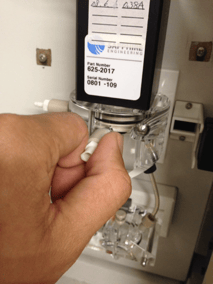
Attach the syringe to the forward-facing Luer fitting at the top of the pump block. Hold the fitting with one hand while simultaneously threading the syringe onto the fitting with the other hand.
Step 3:
Open the Luer fitting by grasping the body of the fitting and turning it and the attached syringe approximately one-half turn counterclockwise.
Step 4:
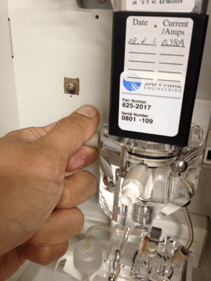
Open the exit fitting at the top left side of the pump block by turning it approximately one half-turn counterclockwise.
Step 5:
Hold an empty tube or beaker under the exit fitting to receive approximately 5 mL of waste. Flush the trap by pushing steadily on the syringe plunger.
It is VERY IMPORTANT that you don’t use excessive force when you push the syringe plunger! This may damage the trap seals, which would not be good. This procedure should only take about 30 seconds. The water trap is only about 325 mL so a relatively small amount of water would be sufficient for flushing your PDP water trap.
If you are unsure if you have enough water to flush, it would be better to add more. Not having enough water to flush would be less effective in comparison to having a little too much. However, be sure to keep the force and flow rate within the limits above.
Step 6:
Be sure to close the Luer fitting FIRST, and the exit Luer fitting SECOND. Do not over-tighten the fittings; they only need to be tight enough to prevent water leaks. If the fittings are too tight, they could be damaged.
Step 7:
Remove the syringe from the Luer fitting. Hold the fitting with one hand while turning the syringe counterclockwise with the other hand.
Here are some pictures to help demonstrate the process. However, if you are in need of more guidance, feel free to give us a call and we would be more than happy to help!

We hope this how-to guide is helpful to you but if you need more help with troubleshooting, feel free to contact us!
Is your machine having problems connecting to the computer? We've got another helpful step-by-step guide that should allow you and your machines to get back in business. Get your copy now!